This post is part of a tutorial for deploying a basic website with monitoring and analytics without using Docker or containers. The introductory post gives an overview of the tutorial.
In the previous post we went over using GoAccess to view server logs. In this part, I'll go over using Sentry to automatically report errors on the client-side.
Sentry has a Developer tier that should meet our needs. As of time of writing this, the Developer tier supports Real-time error tracking, which is the main feature we want. Configuring this for our website will enable the following:
- Client-side errors will be logged and stored
- We will be able to view errors and the details surrounding them (such as browser type)
- We will be notified via email when new errors are encountered by users
Do I need a user consent banner to use this?
Sentry gathers some client-side info to use in tracking errors. If you decide to incorporate Sentry into your website I recommend adding a user consent banner with a Privacy Policy detailing what is done with the user's data. Sentry will help you meet GDPR compliance, but you should still notify your users with a Privacy Policy. There are a lot of way to handle this and I am not a lawyer so I will leave it up to you, the reader, to determine what's best for your website.
Installing and configuring Sentry
First, you will need to make an account with Sentry. In this tutorial, we will be using the hosted version of Sentry, but they also have an on-premise version. After making an account, during Sentry's 'Onboarding' step, they should ask you to Select a Platform for your application. If you are using the website provided for this tutorial, choose React. Otherwise, choose the one that best fits your needs.

Next, Sentry should display a short guide to installing and connecting the SDK to Sentry in your project. It boils down to this:
- Install the package (e.g.,
npm i @sentry/browser) - Connect the SDK (
Sentry.init({dsn:'[your unique url]'}))
You may notice Sentry is 'waiting' for a first event on this 'Onboarding' page. We'll set that up next.
Go ahead and copy that Sentry.init({dsn:'[your unique url]'}) line above the ReactDOM.render method in our example project's src/index.js file. Don't forget to import Sentry import * as Sentry from '@sentry/browser';.
That's it! Sentry will now handle any uncaught errors in our website. Let's test it out.
In our example website, throw a new Error in the src/App.js file in the first line of componentDidMount(). Example:
throw new Error('Hi Sentry!')
Now reload your website locally. You should see the error on the browser page. If you still have the Sentry 'Onboarding' page open notice how that 'waiting for first event' control has updated and our error event was received.
You should even see a button Take me to my event on the Sentry Onboarding page. Go ahead and click that. Take some time to check out the page showing this error. There's lots of great info!
Disabling storing of IP Addresses
Ultimately, this is up to you, but minimizing the amount of data we collect is usually a good idea. Unless you have a specific need to collect IP addresses we can turn this off. Click the 'Projects' item in the sidebar and then click the title of the Project you created for this tutorial. Scrolling down, you should see a Data Privacy section:
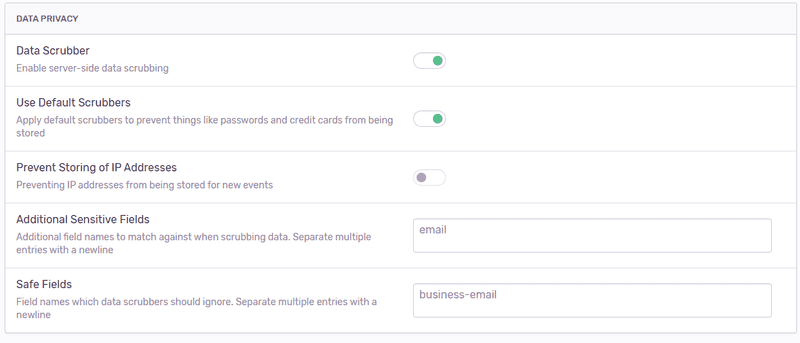
Turn the Prevent Storing of IP Addresses option on. Going forwards, IP Addresses will no longer be stored for events. Unless you really need this data, it's a good idea to turn this setting on. If you want to read more about these settings Sentry has documentation for that.
Configuring Email Alerts for new Issues
Sentry is now receiving events from our website, but it would be nice if we were emailed the details of an event the first time it happens. Support for this is built-in to Sentry. To configure it, click the Settings item in the sidebar. In the Organization sidebar you now see, click the Projects item. Now click your Project in the list of Projects. You should be taken to a Project Settings pane.
From here, click the Alerts item in the General Settings section of the Project sidebar. You should see the following:
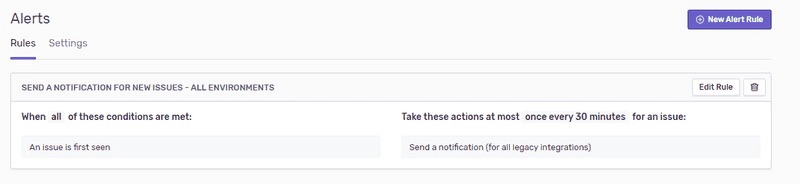
Click the Edit Rule button in the upper right. In the Edit Alert Rule page look for the Take these actions section. In the Select dropdown, select the Send a notification via {service} option:
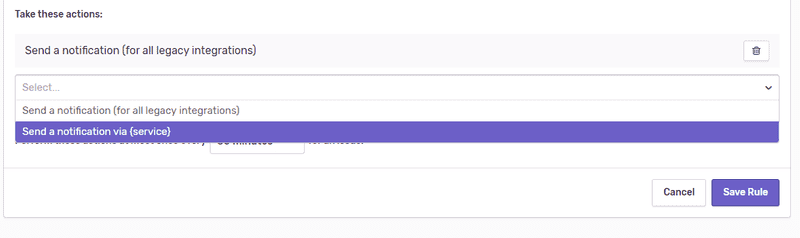
You should see a new action added, using Mail as the default, which is what we want in this case. Now click Save Rule.
Let's go back to our website code and modify our Error so Sentry receives it as a new event. Change the Hi Sentry! string to some other text (e.g., Mail time!) and move it to inside render() in src/App.js so Sentry does not think this event can be grouped with the previous one. Now reload the page locally to cause the error to happen again. You should receive an email with a summary of the error!
It's important to note Sentry supports a variety of services to use for alerts rather than just mail. For example, Slack, if you prefer it to email.
Great! We have covered the absolute basics of adding Sentry to our website to automatically report errors. This gives us a powerful tool to see issues on our site without requiring users to log issues for us so we are aware of them. Between, Sentry and GoAccess, we have some very useful infrastructure with regards to logging and error analysis.
Thanks for reading! In the next and final part, we will go over some next steps for you to take. Part 7